What to Do With Your Hands in Wedding Photos: The Complete Guide
What to Do With Your Hands in Wedding Photos: The Complete Guide
You know that moment when the photographer says "Just act natural" and suddenly you have absolutely no idea what to do with your hands?
They feel like giant, awkward clubs hanging at your sides. You're hyperaware of every finger. Do you let them hang? Cross them? Put them behind your back? Touch something? Nothing feels right.
This is the #1 thing camera-shy couples stress about. Not smiling. Not where to stand. What to do with their hands.
We hear it constantly: "I never know what to do with my hands in photos." Stiff, dangling, or fidgeting hands are the immediate visual cue for discomfort. Your hands give away your anxiety faster than anything else.
Here's the good news: your hands just need a job. A specific task that gives them purpose so they stop feeling awkward and you stop thinking about them.
At One Story Weddings, we've learned concrete, action-oriented techniques that eliminate hand awkwardness for camera-shy couples. These aren't vague suggestions like "just relax"—these are specific positions you can actually use.
Here's exactly what to do with your hands in every wedding photo scenario.
Understanding Why Hands Feel Awkward in Photos
Before we get into the specific positions, let's talk about why hands feel so weird in the first place.
In normal life, your hands are constantly busy:
Holding your phone
Gesturing while talking
Touching things
Doing tasks
Your brain doesn't have to think about what your hands are doing—they just do it automatically.
But the moment a camera is pointed at you:
Your hands suddenly have nothing to hold
You become hyperaware of them
They feel oversized and awkward
You don't know what "natural" looks like anymore
The solution isn't to "relax" (impossible when you're anxious)—it's to give your hands a specific job.
When your hands have a clear purpose, your brain focuses on that task instead of obsessing over "what are my hands doing right now?"
That's what these 15 positions do: they give your hands something specific to do so you can stop thinking about them.
Why Hands Look Big or Weird in Photos
Here's something that stresses people out: "My hands look huge in photos. Why do they look so much bigger than in real life?"
The truth about hand size in photos:
Camera angle affects perceived size:
Hands closer to the camera look larger (lens distortion)
Hands at odd angles appear bigger
Flat, straight-on hands look wider
How photographers minimize this:
Photograph hands at angles, not straight-on
Position hands further from camera lens
Use hand positions that create natural curves and depth
Avoid having hands closest to camera in frame
What you can do:
Keep hands doing something (holding, touching, resting)
Avoid splaying fingers wide
Let fingers curve naturally
Don't stick hands straight toward camera
The good news: Professional photographers know how to position you so hands look proportional and natural. These techniques all work with proper angles to prevent the "giant hand" problem.
Standing Portraits: What to Do With Your Hands Together
These positions work when you're standing together for couple portraits, facing the camera or at an angle.
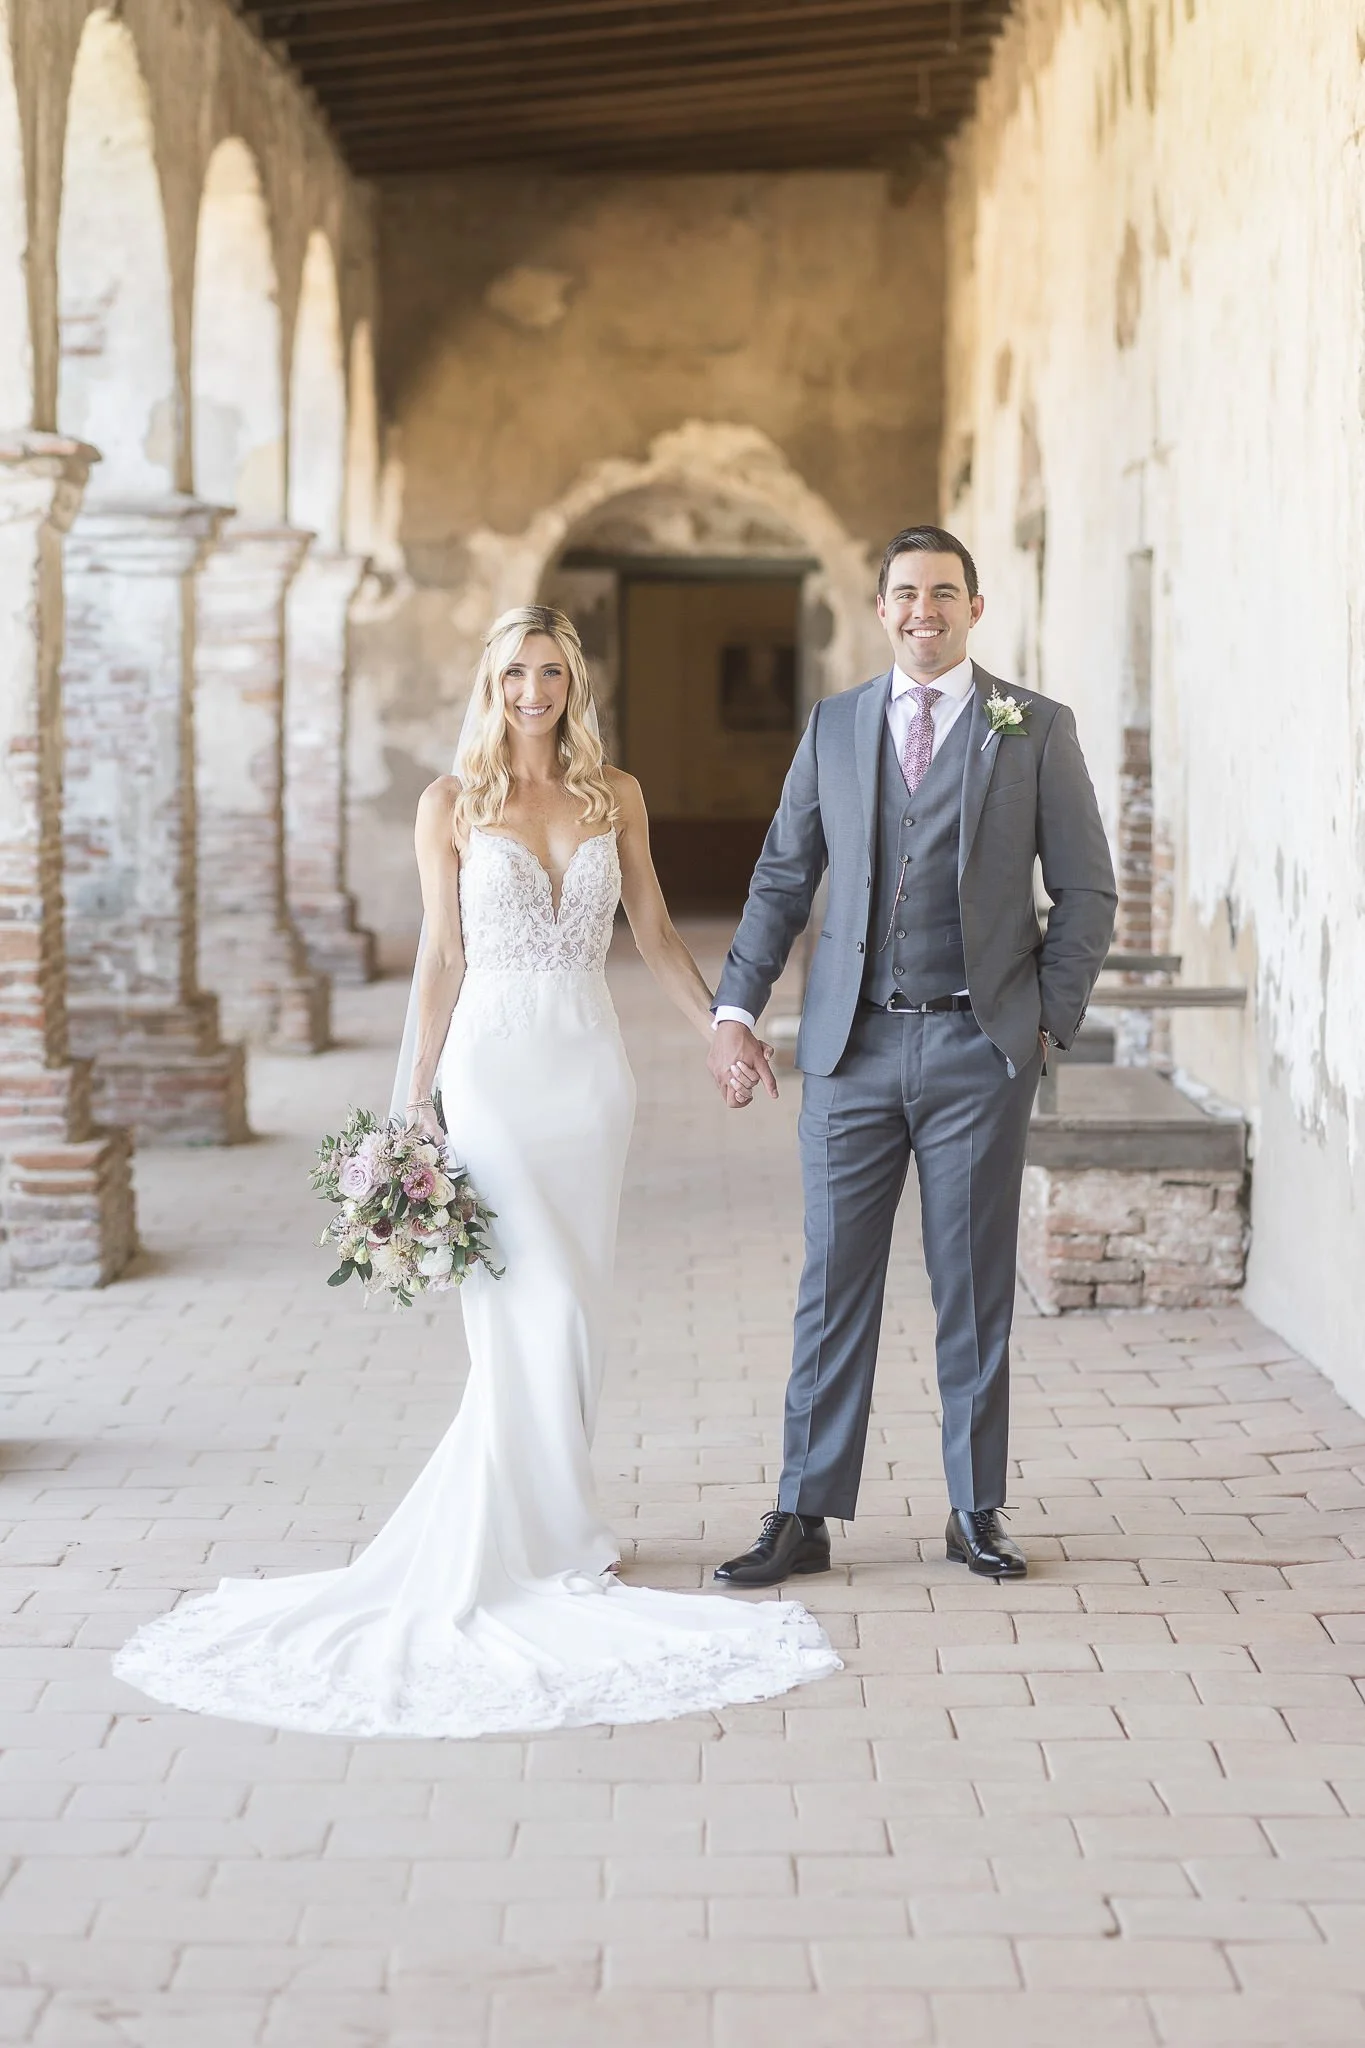
1. The Classic Hand Hold
How to do it:
Stand side by side, hold hands between you
Interlock all your fingers completely (not just palms touching)
Let your arms hang naturally at your sides with slight elbow bend
Don't squeeze tight—keep the grip soft and relaxed
When to use it: Simple, classic couple portraits. Works for any setting or formality level.
Pro tip: If there's a height difference, the taller person's arm should angle slightly down, the shorter person's slightly up. This keeps both arms in natural, comfortable positions.

2. The Front Embrace
How to do it:
Face each other or stand at an angle
Groom: Place both hands on her waist or lower back
Bride: Wrap both arms around his neck, or rest hands on his chest/shoulders
Let your bodies come close together naturally
When to use it: Romantic couple portraits. Creates intimacy and connection.
What NOT to do: Don't hover hands near partner without actually touching. Commit to the position—hands should make full, comfortable contact.


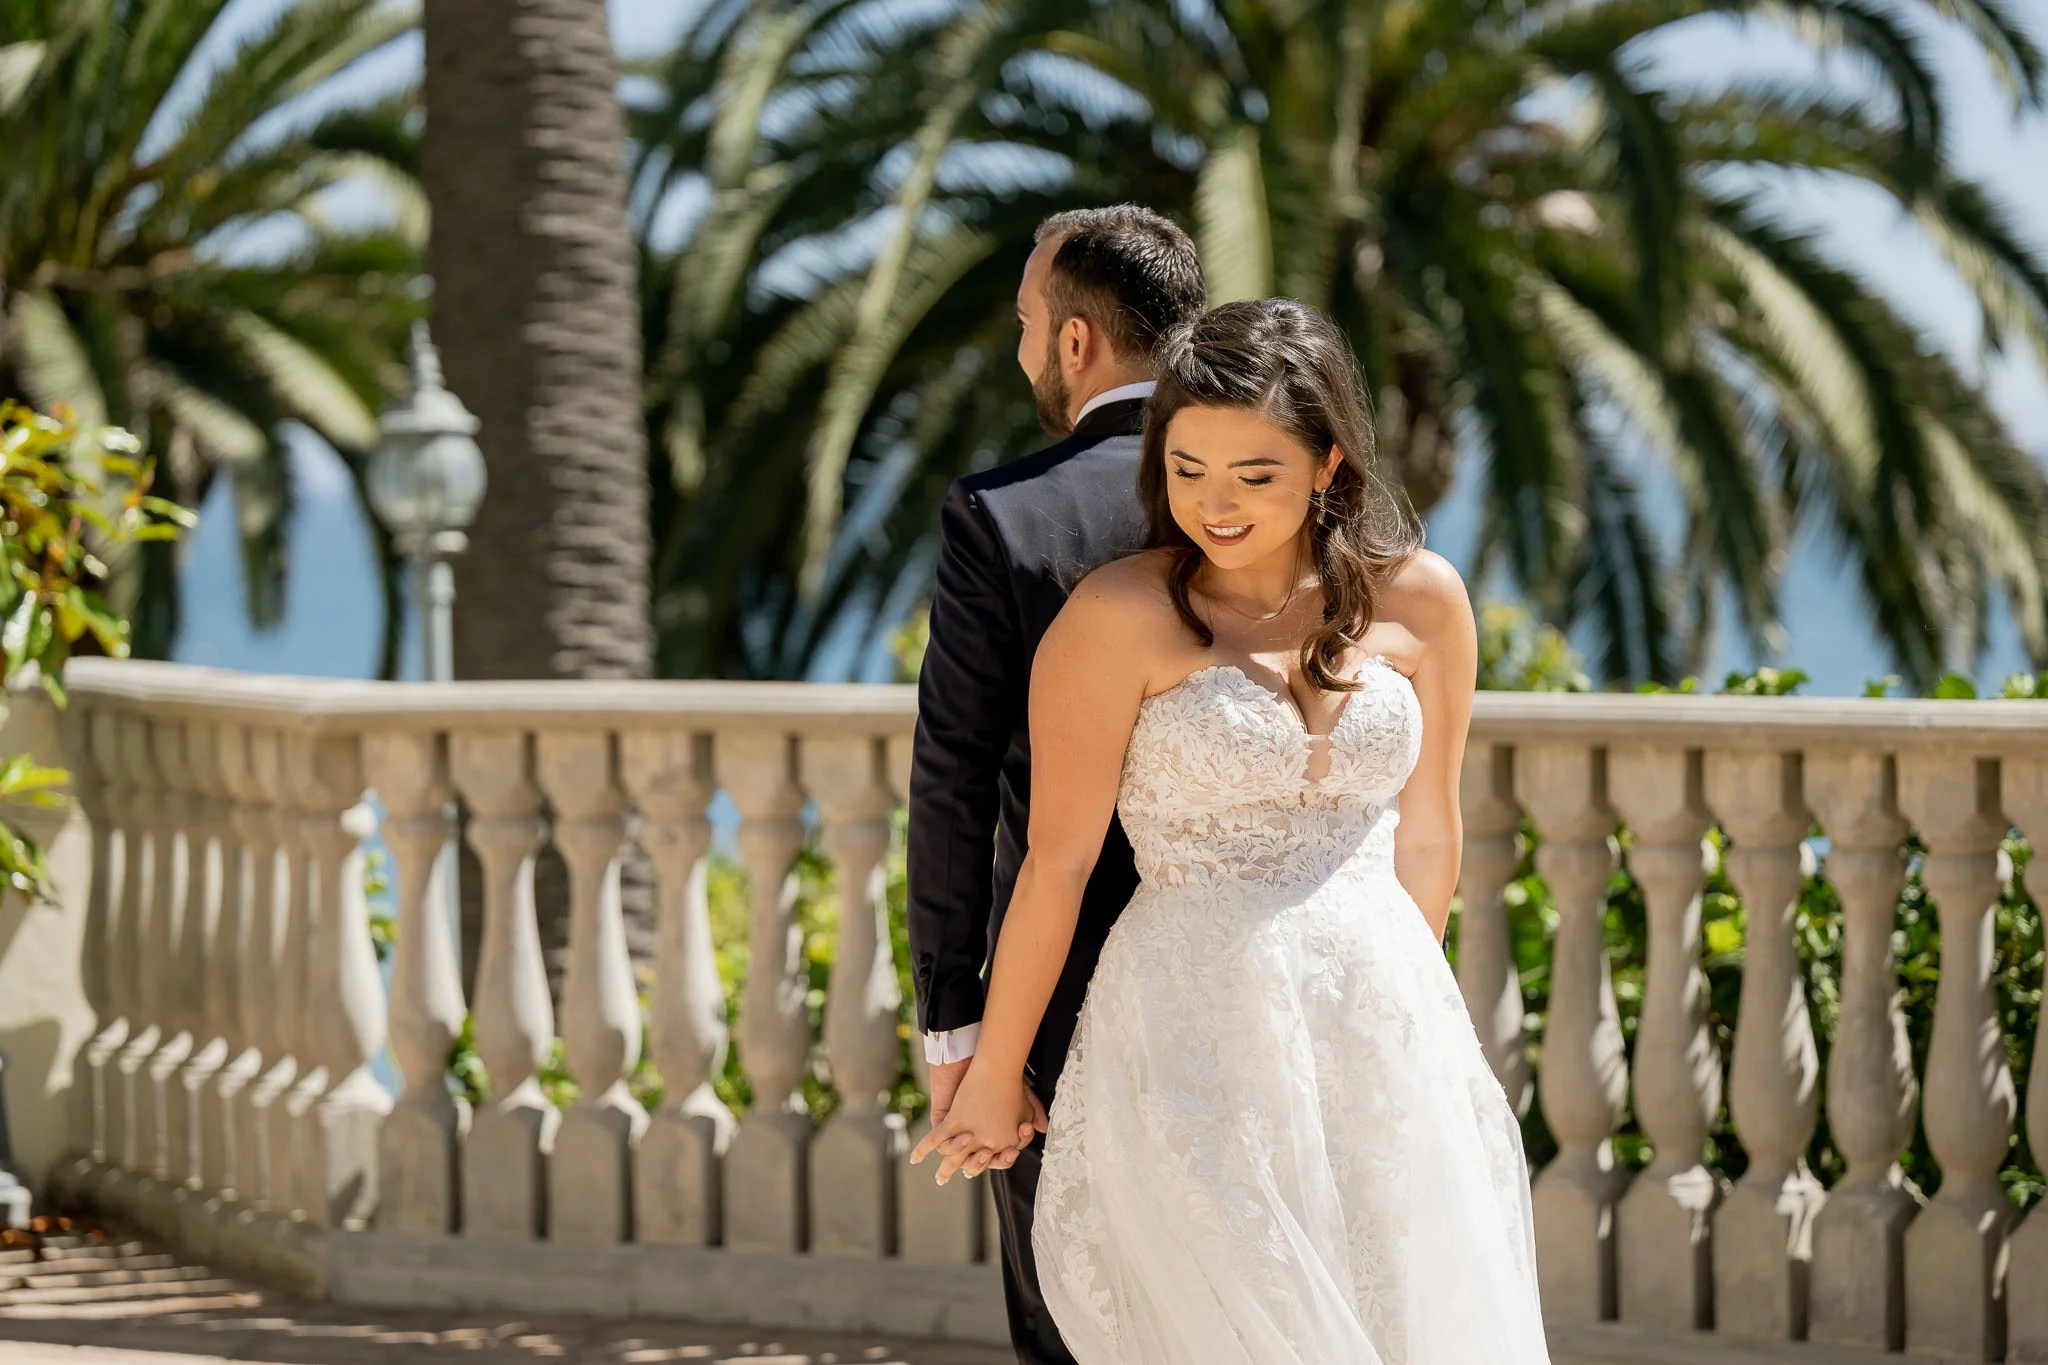
3. The Side Embrace
How to do it:
Stand side by side
One partner wraps arm around the other's waist or back
Other partner's hand can rest on their partner's chest, hip, or shoulder
Both lean in slightly toward each other
When to use it: Casual, comfortable portraits. Works great for walking shots too.
Variation: Both partners wrap arms around each other's backs, creating a mutual embrace.


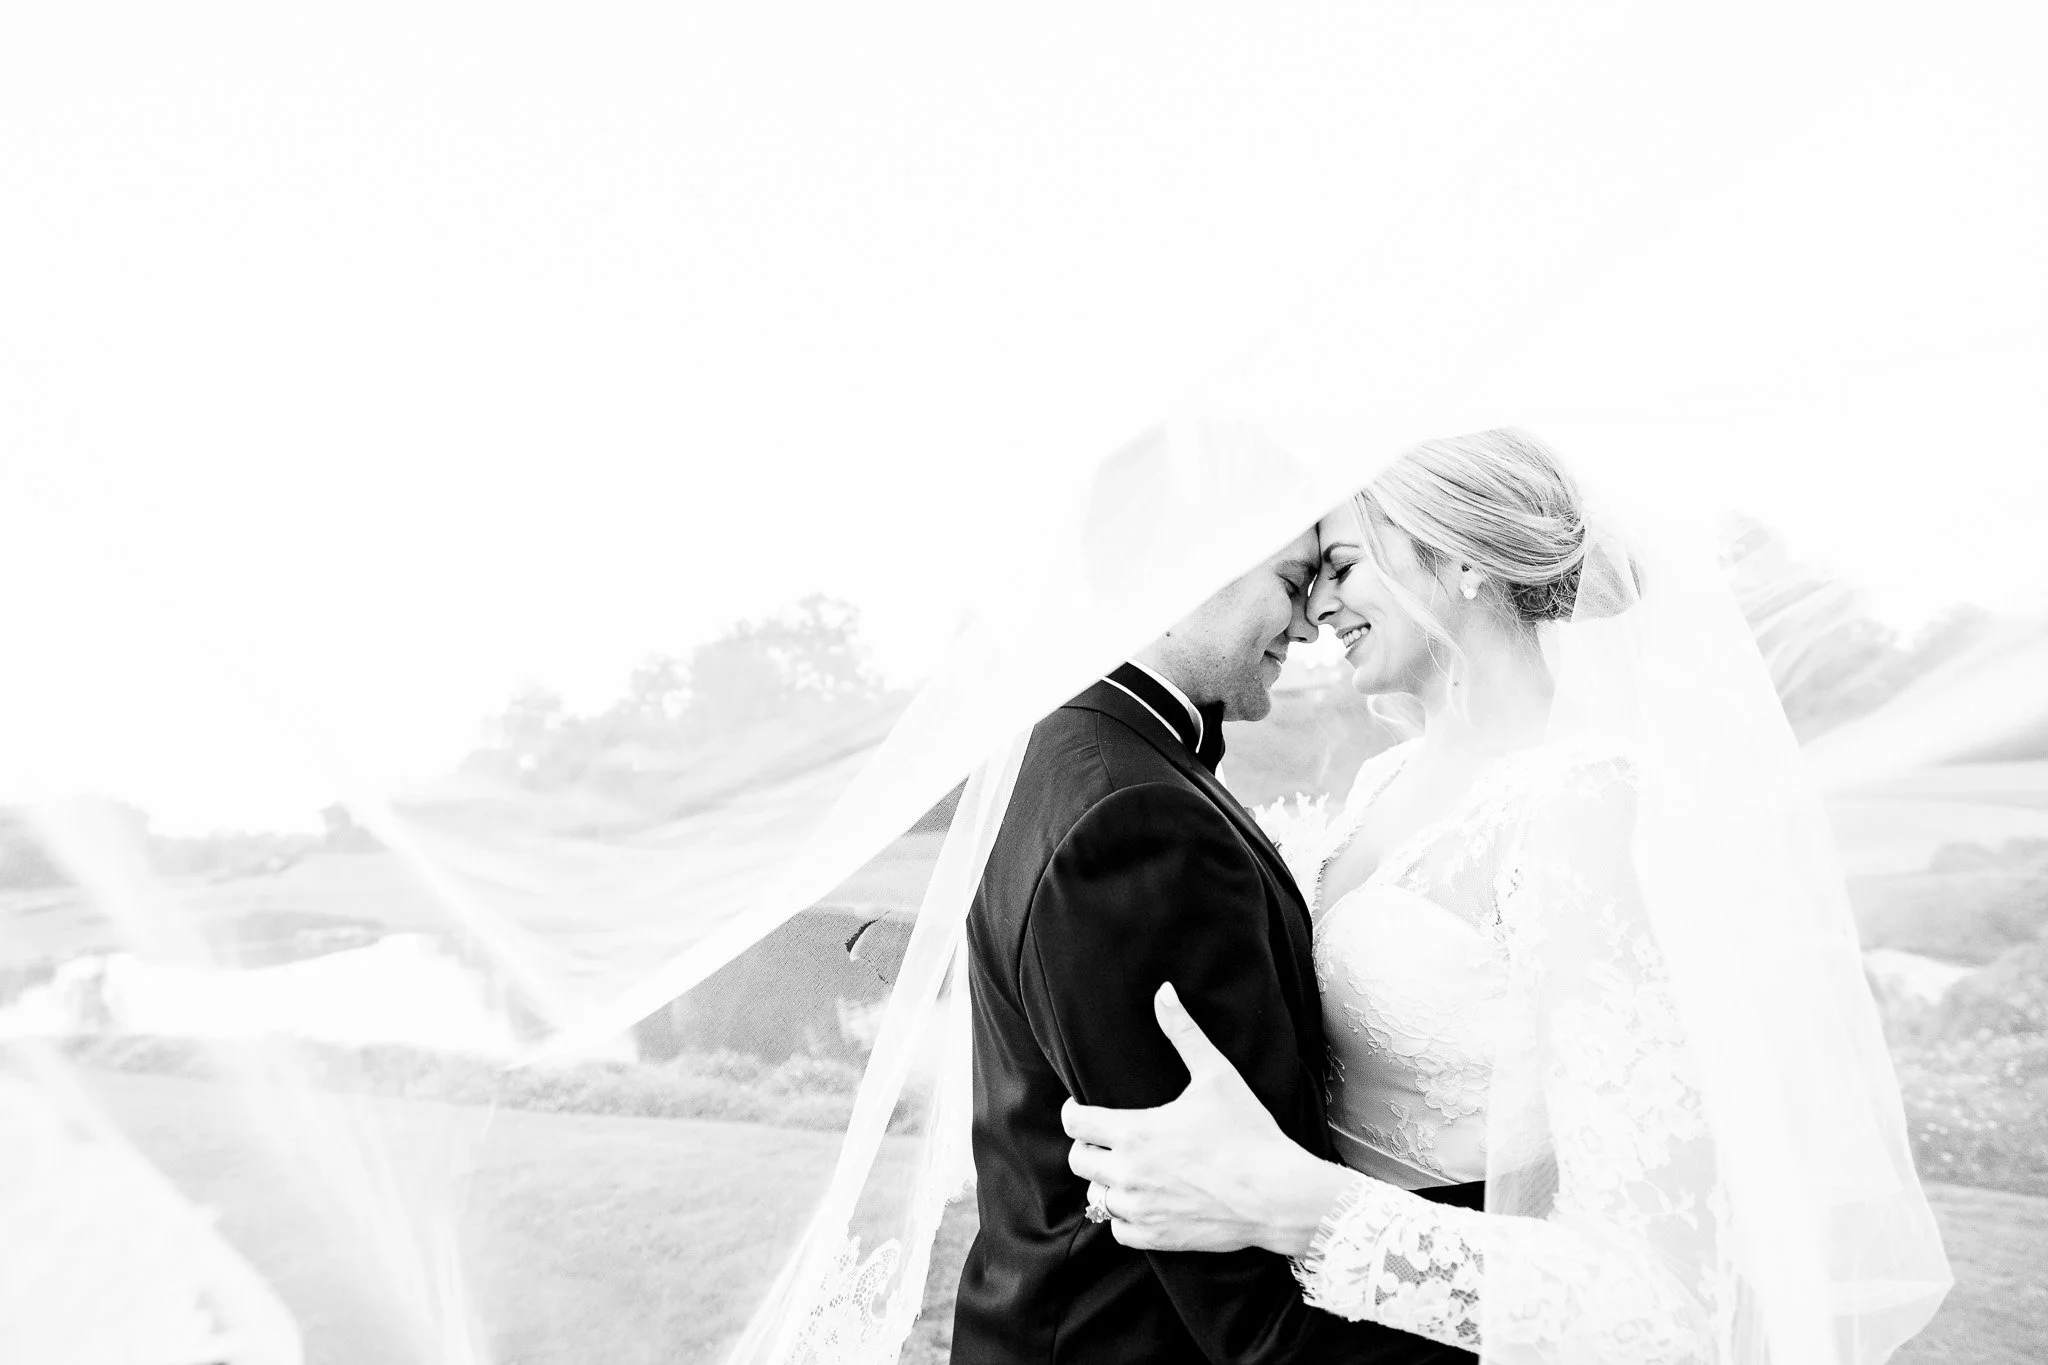
4. The Back Wrap
How to do it:
One partner stands behind the other
Back partner: Wrap both arms around front partner's waist or shoulders
Front partner: Rest hands over their partner's hands/arms
Both lean into the embrace
When to use it: Perfect for camera-shy couples—the front person is "protected" and the back person doesn't have to worry about their expression as much.
Pro tip: This is especially flattering for brides who want their dress to be the focal point, with the groom providing support from behind.


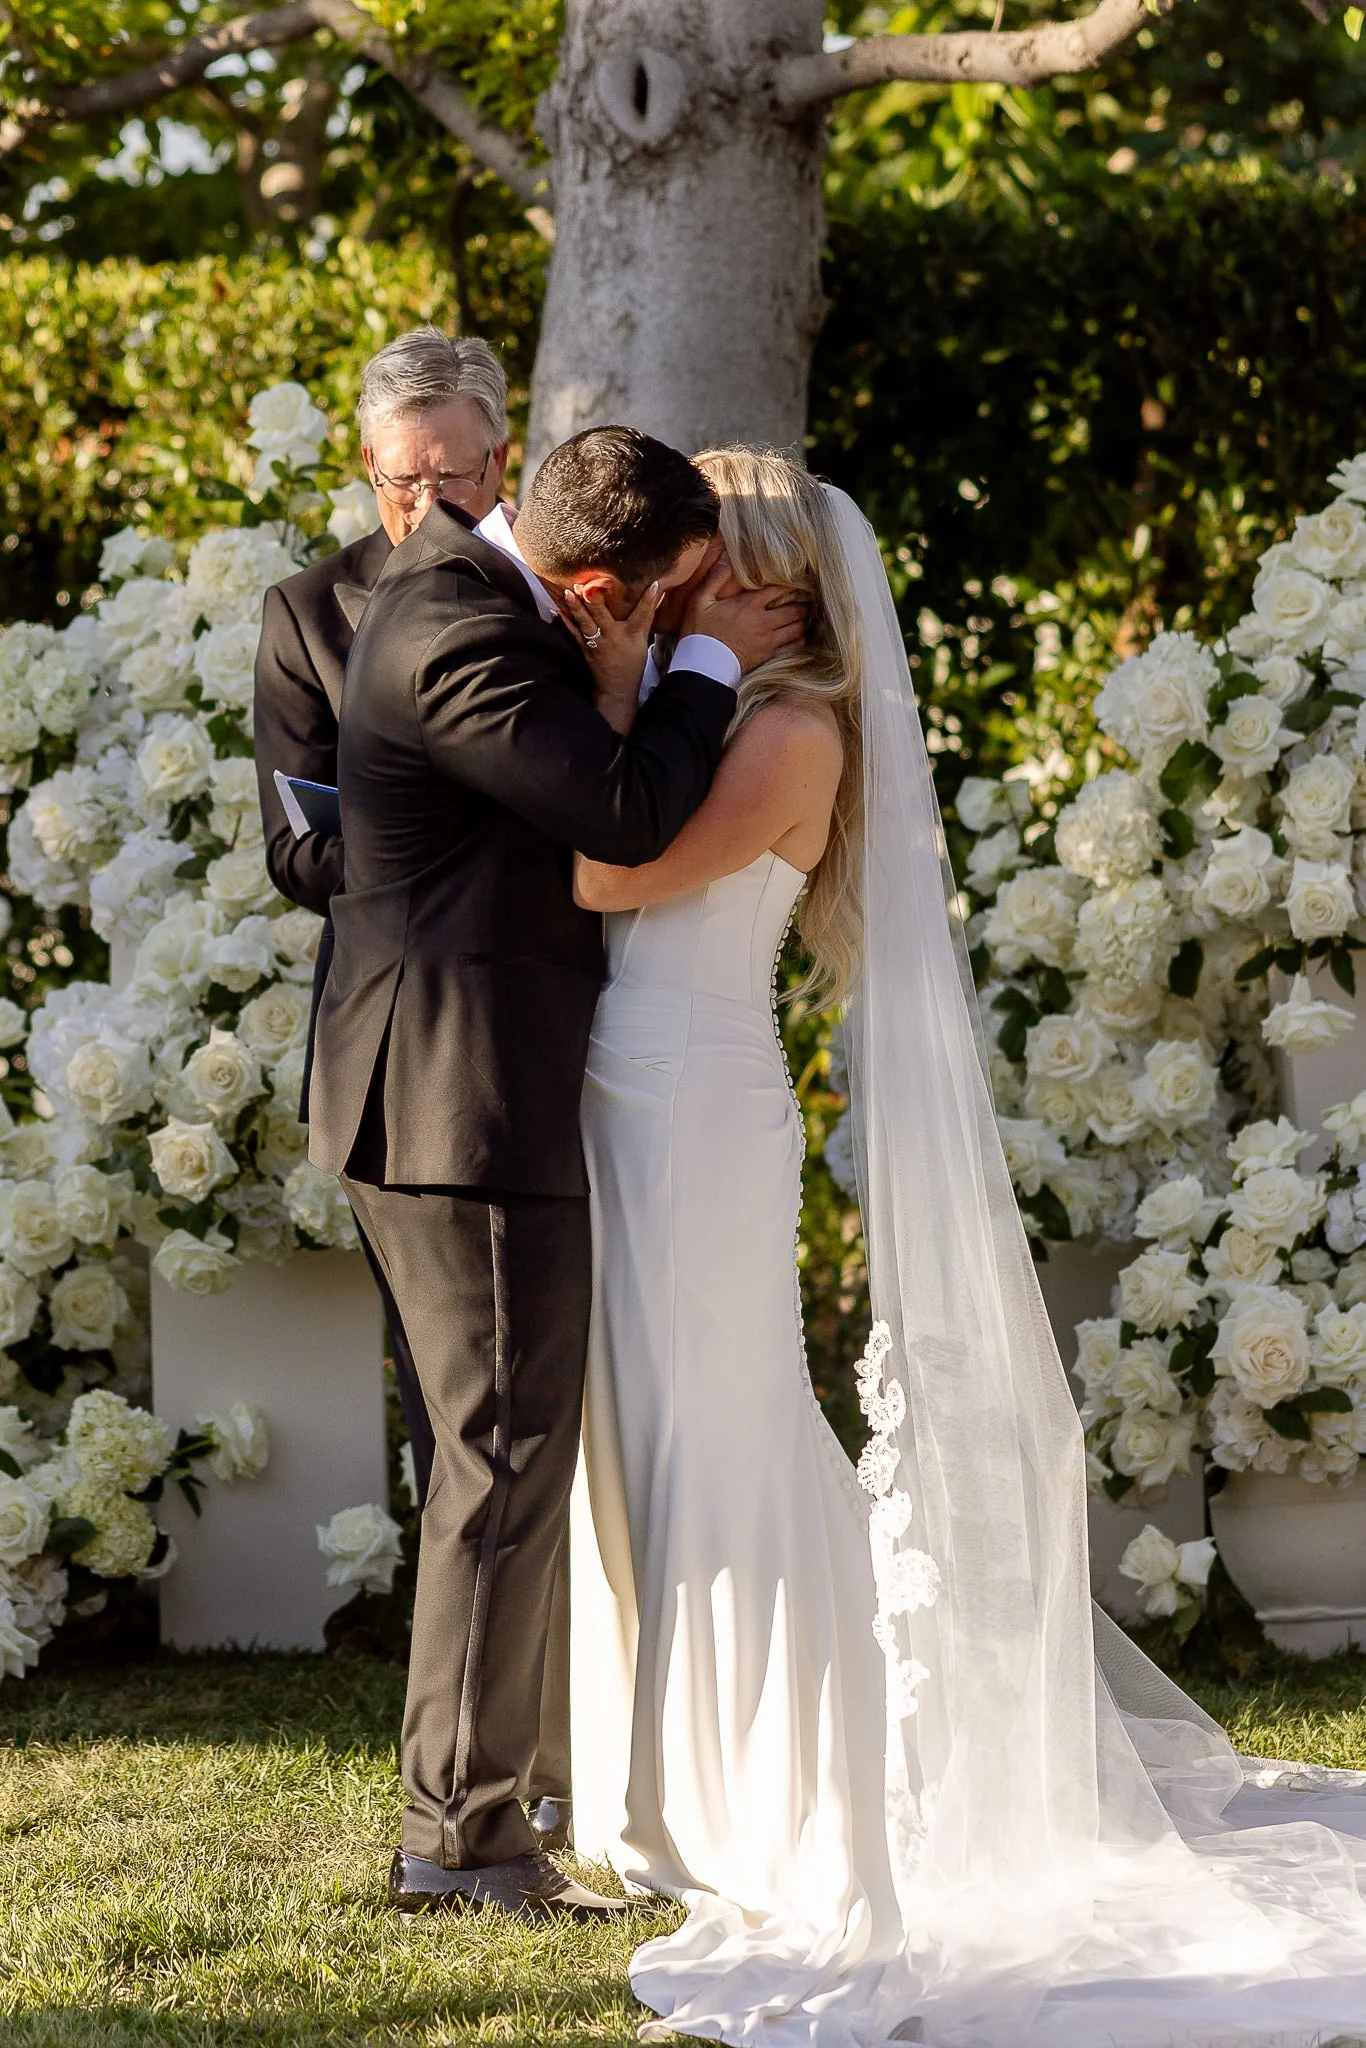
5. The Face Hold
How to do it:
Face each other closely
One or both partners: Gently hold partner's face with one or both hands
Fingers should be soft and curved, not stiff
Can lead into a kiss or just an intimate face-to-face moment
When to use it: Intimate, romantic moments. Creates beautiful focal point on faces and connection.
What NOT to do: Don't press hard or squish your partner's face. Light, gentle contact looks more natural and romantic.


Walking and Movement: Hands in Motion
Movement eliminates stiffness. When you're walking or moving, your hands naturally relax because they're doing something purposeful.
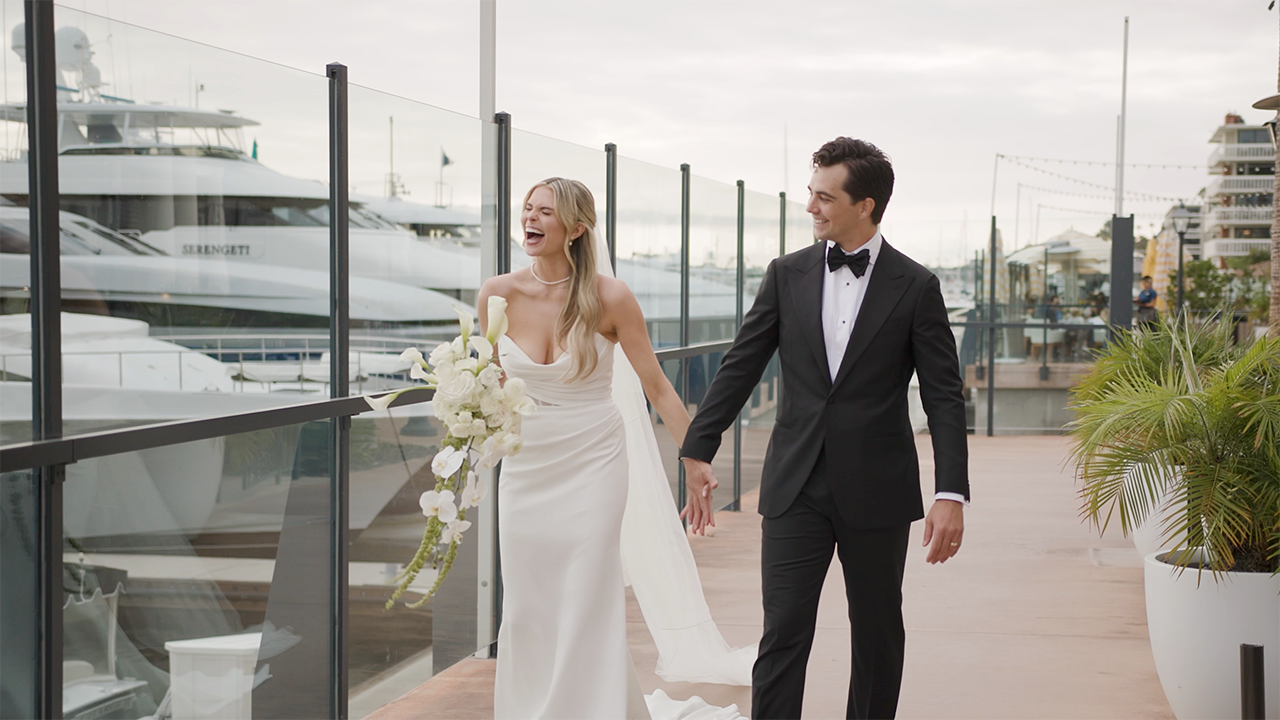
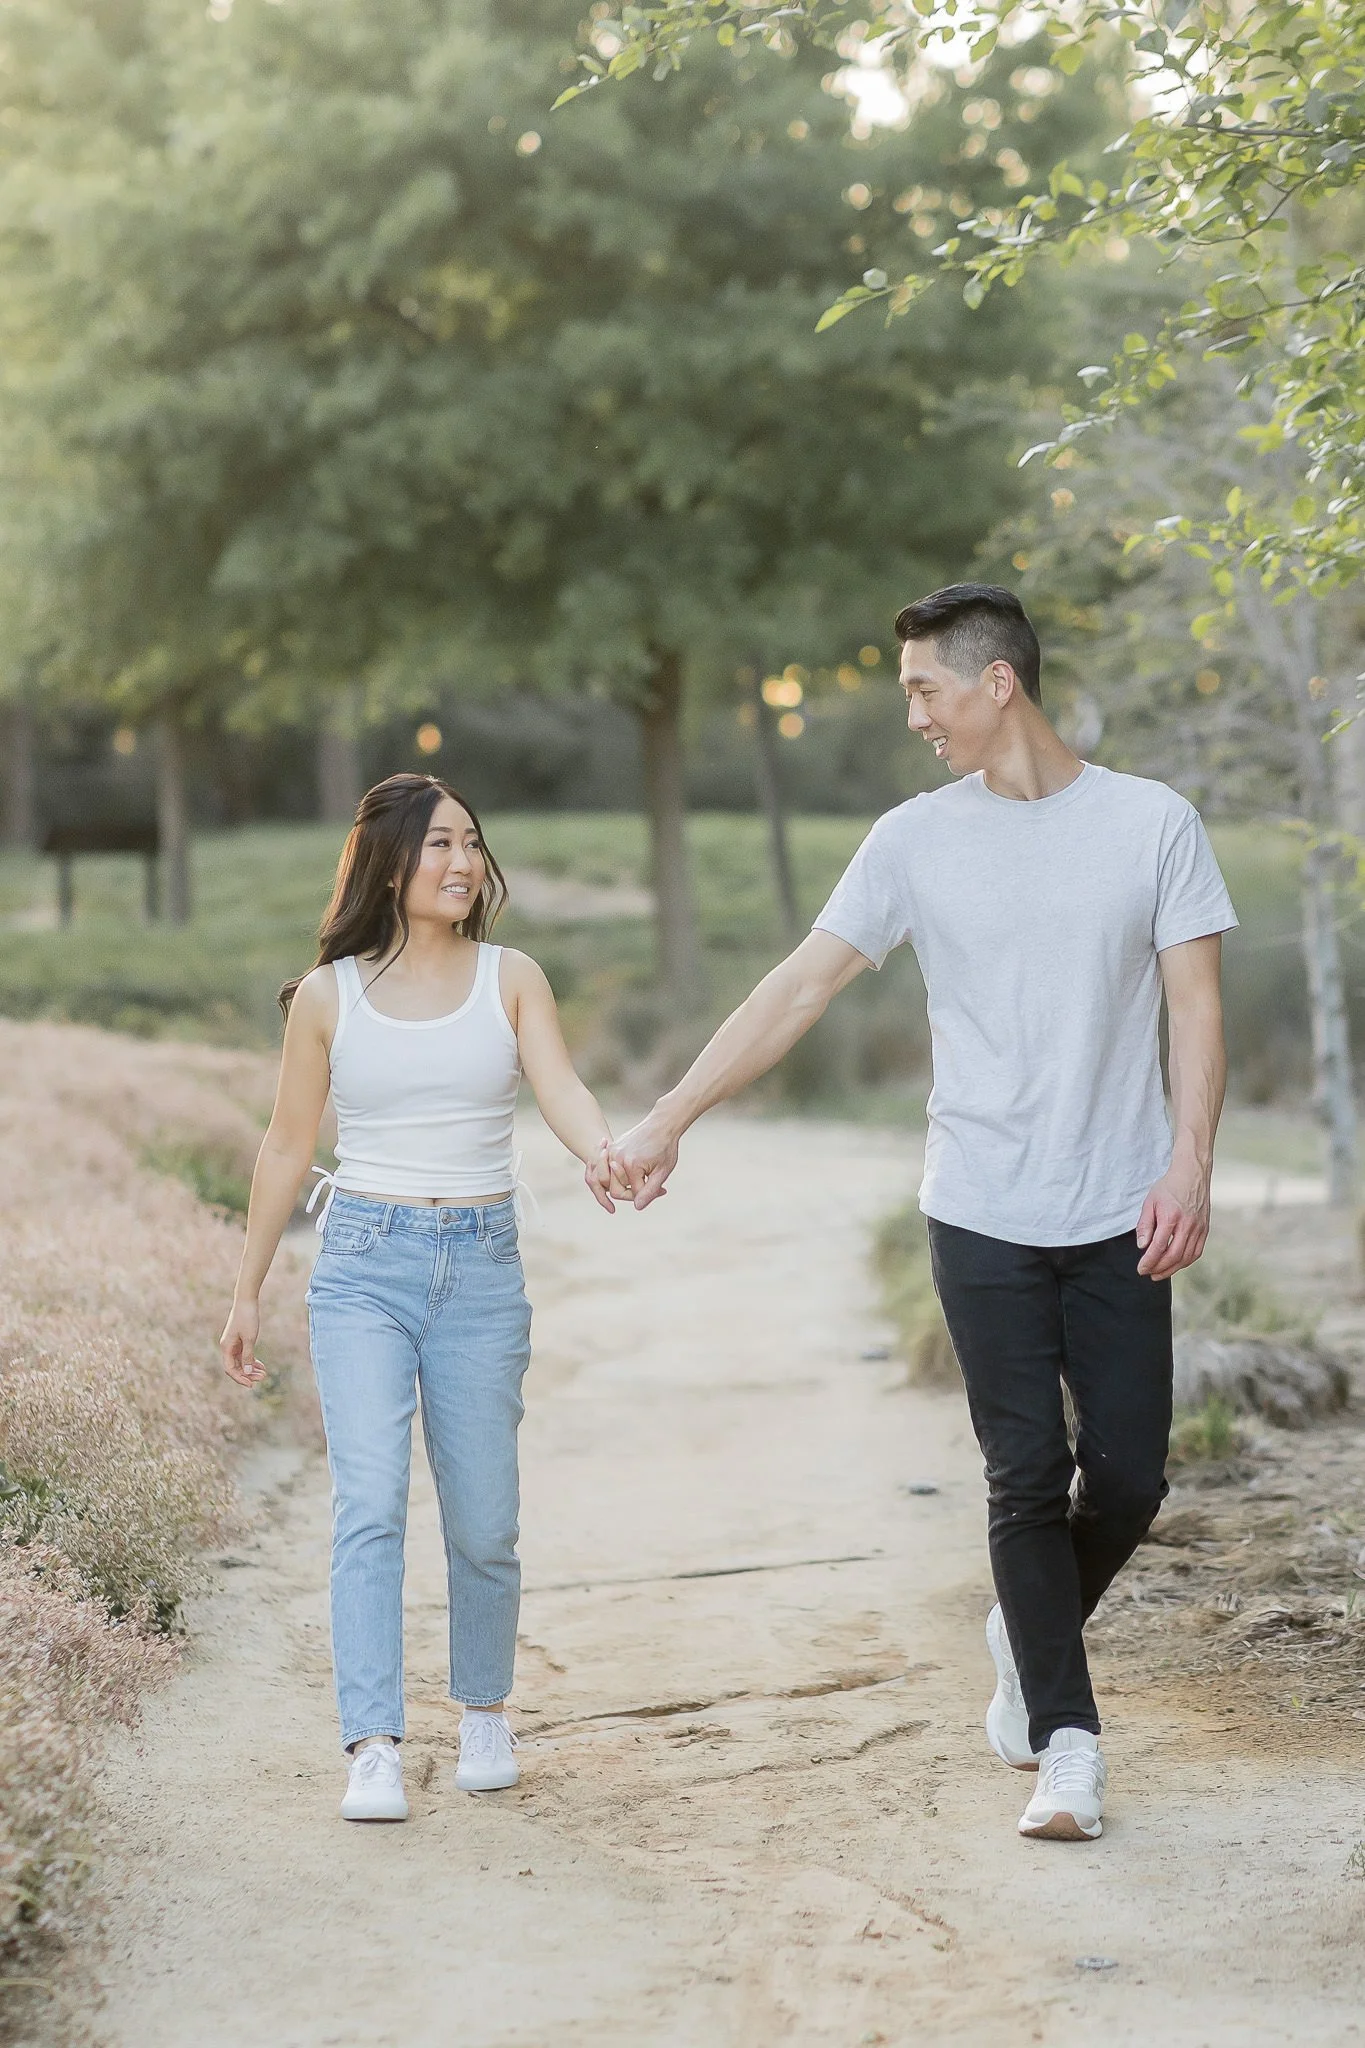
6. The Walk and Swing
How to do it:
Hold hands and walk naturally toward or past the camera
Let your arms swing gently as you walk
Keep your grip relaxed, not tight
Look at each other or straight ahead, depending on photographer's direction
When to use it: This is our go-to for anxious couples. Walking gives your whole body purpose, and hand-holding happens naturally.
Pro tip: Don't exaggerate the arm swing—just walk normally. The natural movement is what makes this work.

7. The Turn and Touch
How to do it:
Walk together, then turn toward each other
As you turn, let one hand naturally find your partner's arm, face, or waist
The trailing hand continues the momentum of the turn
When to use it: Creates dynamic, romantic images with natural movement and connection.
Why it works: Your hands move with purpose (completing the turn) so they don't feel awkward or planned.
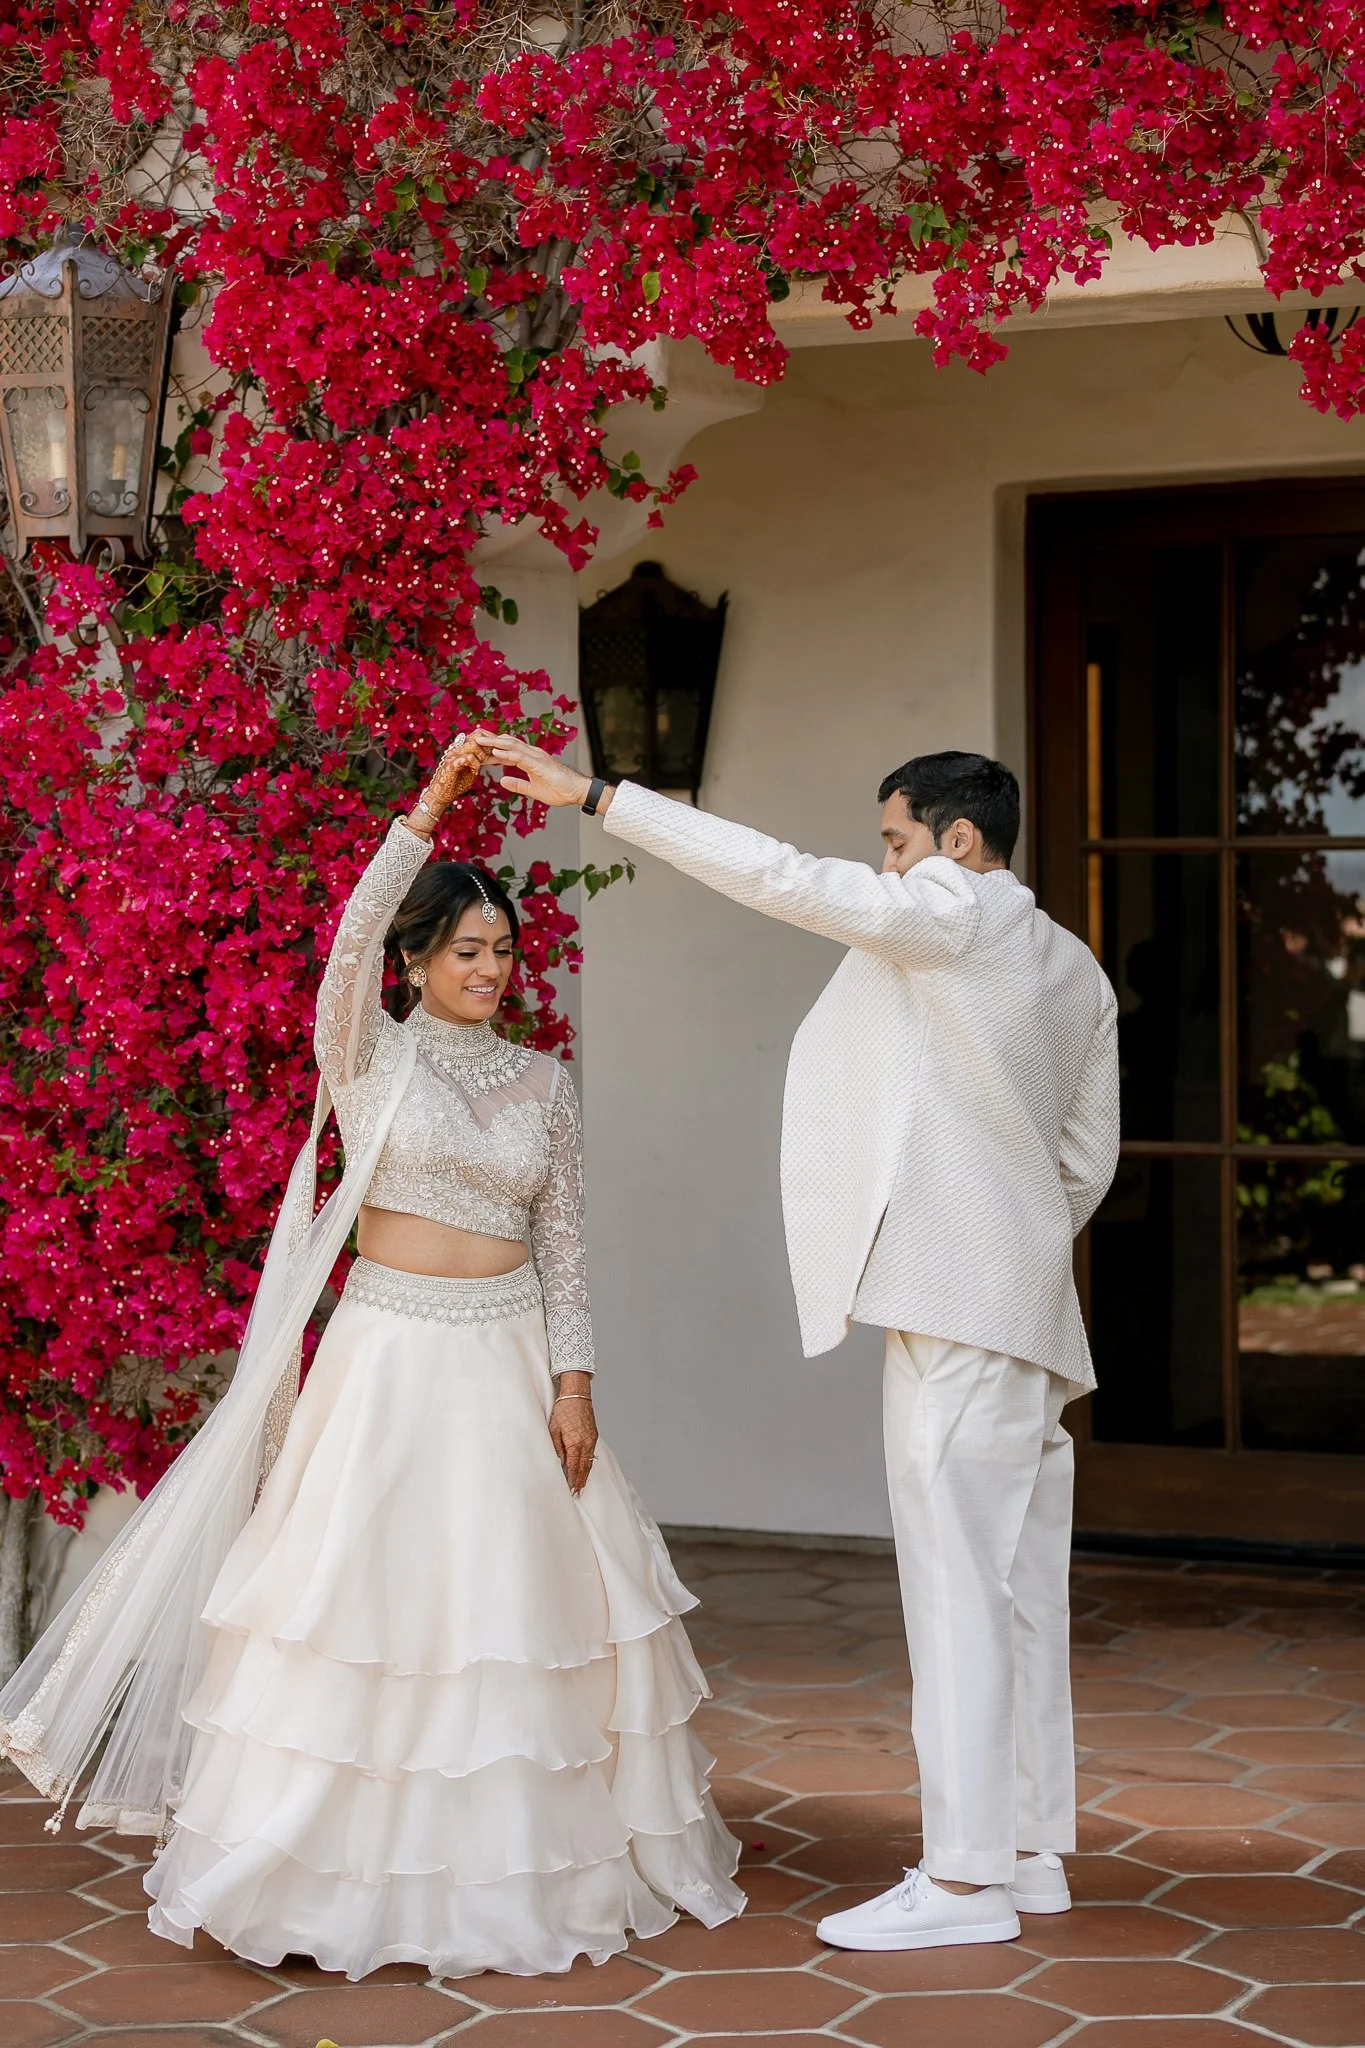
8. The Spin and Catch
How to do it:
Groom: Hold bride's hand and spin her
As she completes the spin, pull her close
Bride: Let your hands naturally find his chest, shoulders, or arms as you're pulled in
Both hands are busy with the movement
When to use it: Playful, joyful portraits. Works best for couples comfortable with movement and not overly self-conscious.
What NOT to do: Don't overthink it. The motion creates natural hand placement—just let it happen.

For Grooms: What to Do With Your Hands
Grooms often feel MORE awkward than brides because they don't have a bouquet to hold. Here are groom-specific positions.
9. The Pocket (Multiple Variations)
Thumb out, fingers in (Most common and flattering):
Rest thumb on outside of pocket, fingers tucked inside
Creates clean line and relaxed posture
Works with jacket buttoned or unbuttoned
Can do one hand or both
Hand halfway in:
Only fingertips in pocket, rest of hand visible
More casual, modern look
Best with unbuttoned jacket
Hand fully in pocket:
Only works if you're turning, moving, or very casual setting
Both hands fully in pockets works ONLY with jacket unbuttoned
When to use it: Groom standing alone, with groomsmen, or waiting for bride. Creates confident, relaxed appearance.
Pro tip: If your jacket is buttoned, keep it to one hand in pocket maximum. Both hands in pockets requires an unbuttoned jacket to avoid looking stiff.


10. The Jacket Adjustment
How to do it:
Use one hand to adjust your jacket button, lapel, or cuff
Other hand can rest at side, in pocket, or holding bride's hand
Creates natural, "getting ready" moment
When to use it: Getting ready photos, pre-ceremony portraits, any time you need something for hands to do.
Variation: Hold jacket over your shoulder with one hand (casual, confident look).


11. The Tie Touch
How to do it:
Use one or both hands to adjust your tie
Can be straightening it, loosening it slightly, or just touching it
Creates natural movement and purpose
When to use it: Getting ready photos, candid moments, or when you need a natural hand position while standing.
Works well when: Bride is adjusting your tie for you—both sets of hands have jobs.
For Brides: What to Do With Your Hands
Brides have the advantage of bouquets, but there are many other options beyond just holding flowers.
12. Holding Your Bouquet (The Right Way)
This seems obvious, but most brides hold bouquets incorrectly, which looks awkward.
The correct position:
Hold bouquet with both hands at your natural waistline (lower than you think)
Elbows slightly bent, not locked straight
Grip stems firmly but not in a death grip—you should see natural finger curves, not white knuckles
Bouquet should rest against your body slightly, not held out in front
Common mistakes:
Holding too high (at chest level looks stiff)
Death grip (tense hands visible, white knuckles)
Held too far from body (creates gap, looks unnatural)
Arms perfectly straight (creates tension)
Variations:
The one-handed bouquet hold:
Hold bouquet in one hand at your side (low, near your hip)
Other hand free to touch partner, dress, or rest naturally
Creates asymmetry that's more interesting than centered bouquet
The bouquet touch:
Hold stems with one hand
Other hand gently touches the flowers themselves
Draws attention to beautiful blooms
Both hands have jobs
When to use it: Any bride portraits, with or without partner. Bouquet gives hands automatic purpose.


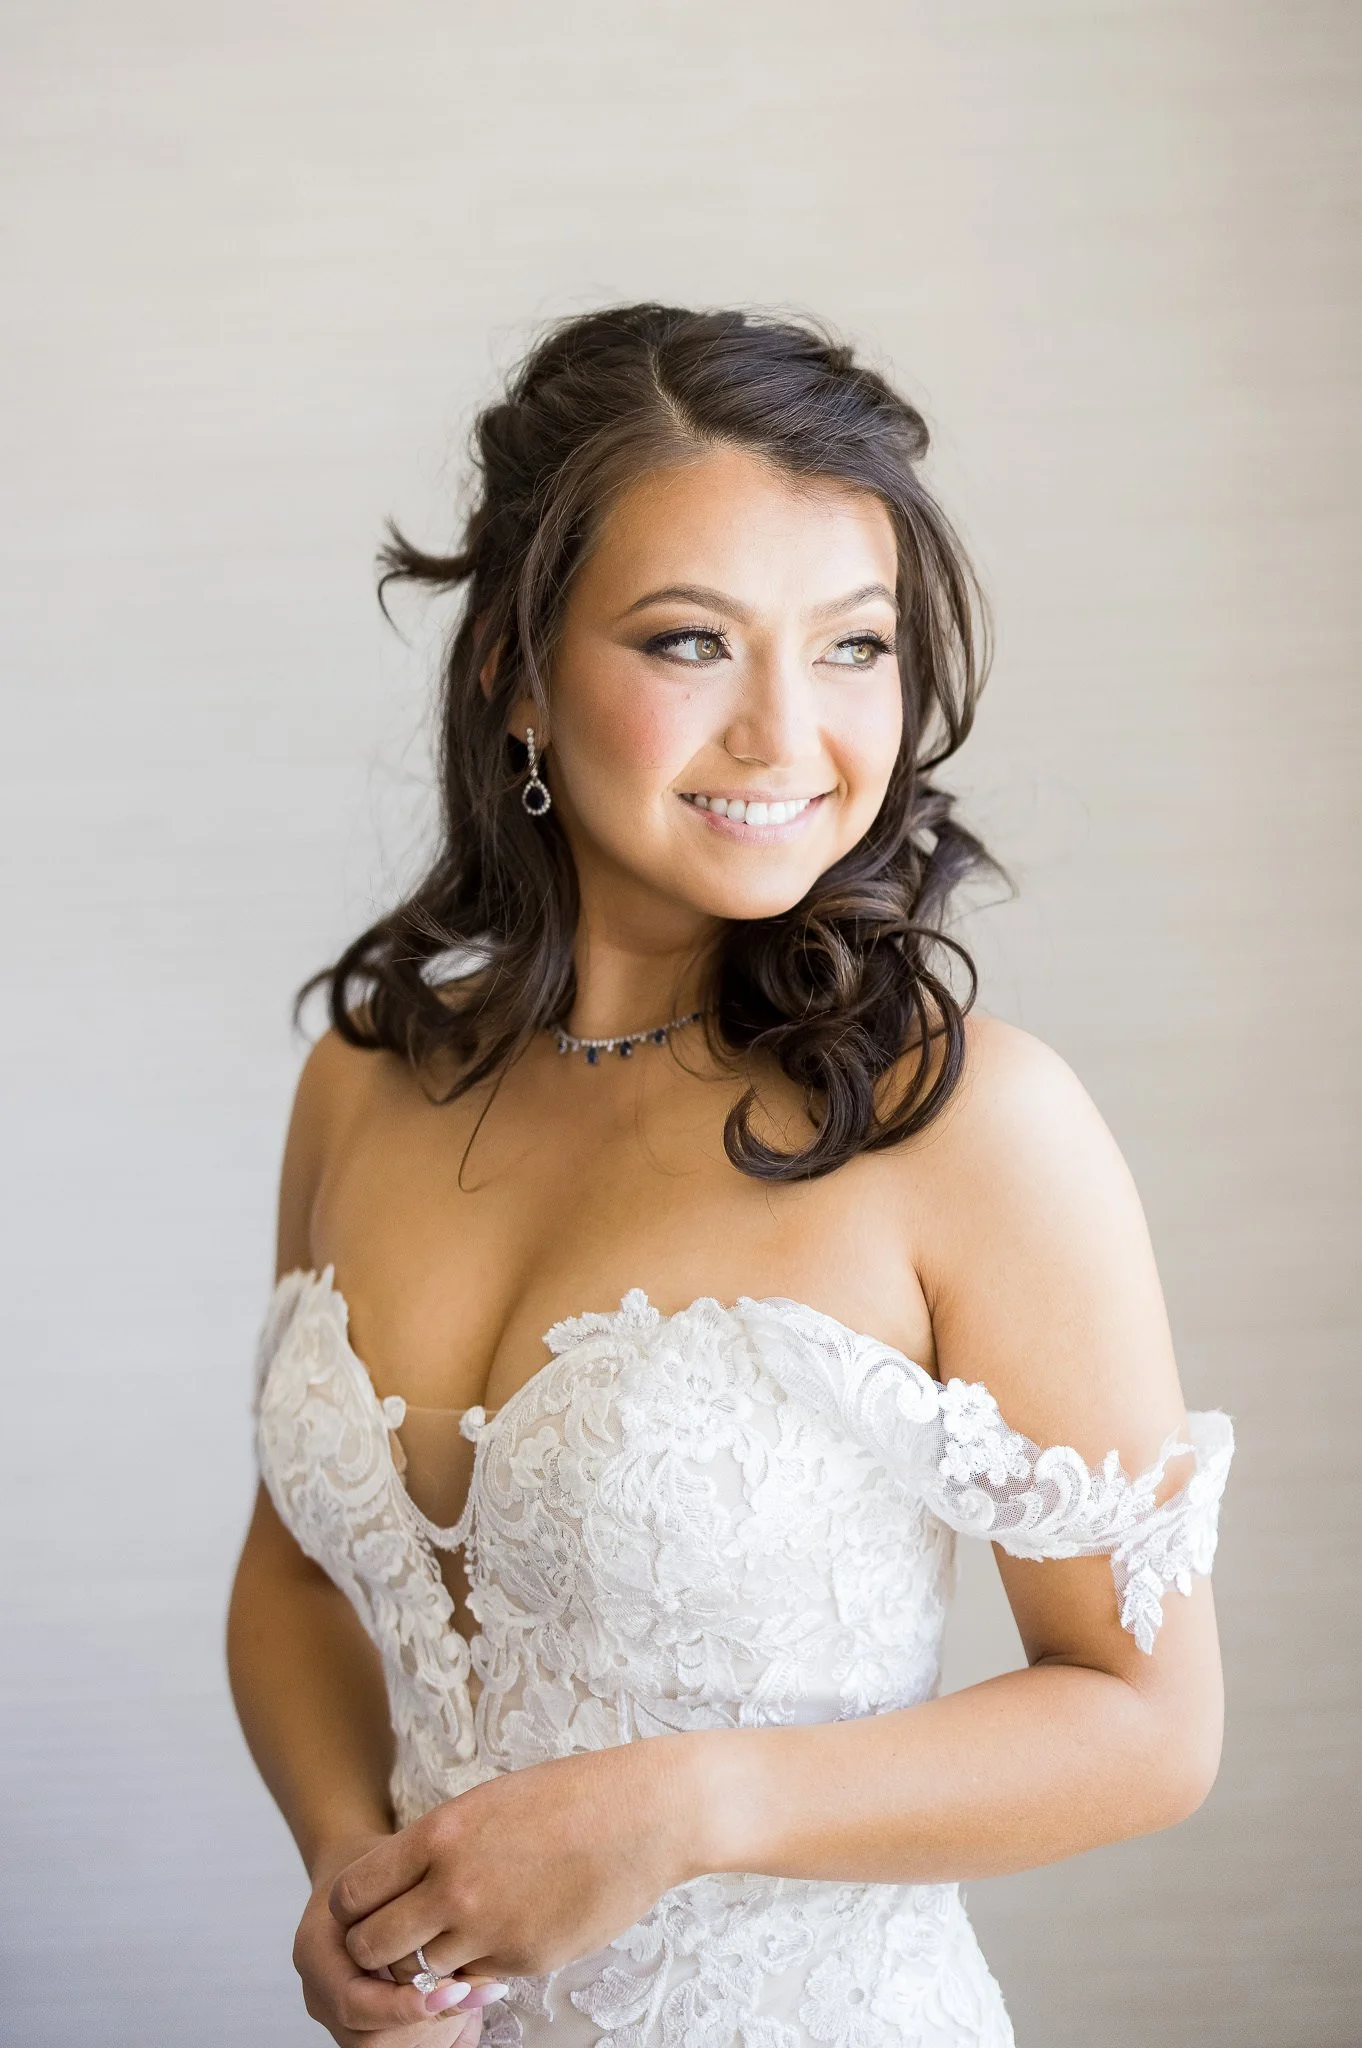
13. The Ring Touch
How to do it:
Gently touch, spin, or adjust your engagement ring with your opposite hand
Can be subtle (just fingertips touching ring) or more obvious (gently spinning it)
Works while standing, waiting, or during quiet moments
When to use it: Solo bridal portraits, waiting between shots, any time you need something natural for hands to do.
Why it works:
Gives both hands specific jobs
Looks contemplative and romantic in photos
Creates subtle movement that prevents stiffness
Natural fidgeting that people actually do
Perfect for camera-shy brides
Variation: Touch your ring while also holding your bouquet—one hand on bouquet, other hand touching your ring finger.

14. The Dress Touch
How to do it:
Use one or both hands to gently hold, lift, or adjust your dress
Can be holding the skirt slightly out (showcasing the dress)
Lightly touching the fabric at your side
Adjusting the train or veil
When to use it: Solo bridal portraits, walking shots, detail-focused images showcasing your dress.
Pro tip: Don't grip the dress tightly. Let your hands rest gently on the fabric with soft, curved fingers.
Variations:
Hold skirt slightly out to show off the fullness
Lift hem slightly while walking (practical and pretty)
Touch lace or embellishments on the bodice
Adjust veil with one hand


15. The Tiny Purse (Relaxed Hand Shape)
How to do it:
Bring your hands and fingers together gently, as if you're holding a very small, delicate purse
Let your fingers curve naturally and softly around this invisible object
Position hands at your side or in front of you at natural waist height
Keep the grip light and relaxed—you're not actually gripping anything
When to use it: When you have nothing to hold and need a natural resting position for your hands. Works for standing portraits or waiting between shots.
Why it works: Creates a natural curve in your hands and fingers instead of the stiff, straight-finger look. Gives your hands a gentle shape without requiring a prop.
What NOT to do: Don't actually squeeze or grip tightly—this creates tension. Just let your hands come together with that soft, natural curve as if barely holding something delicate.


Sitting Portraits: Hand Positions When Seated
Sitting creates different challenges for hand positioning. Here's what works.
Hands on Your Lap
How to do it:
Rest hands gently on your lap, one over the other or side by side
Let fingers curve naturally, not stiff and straight
If showing your ring, position that hand slightly forward and higher
When to use it: Formal seated portraits, bride sitting alone, couple sitting together.
Hands on Partner
How to do it:
Rest one hand on partner's knee, shoulder, or arm
Other hand can rest on your own lap or hold their hand
Creates connection even while seated
When to use it: Couple portraits while sitting on couch, bench, or chairs.
Hands on Furniture
How to do it:
Rest one hand on armrest, back of chair, or bench
Creates casual, relaxed appearance
Other hand on lap or touching partner
When to use it: Creates natural anchor point and prevents hands from feeling awkward with nowhere to go.
Pro Tip: For couples interested in editorial style wedding portraits, sitting opens up additional editorial style photography possibilities.


What NOT to Do With Your Hands (Common Mistakes)
Understanding what NOT to do is just as important as knowing the right positions.
The Straight-Arm Hang
What it looks like: Arms locked straight down at your sides, hands hanging with straight, stiff fingers.
Why it's awkward: Creates visible tension. Looks like you're standing at attention or don't know what to do.
Fix: Always keep elbows slightly bent. Let fingers curve naturally instead of hanging straight.
The Fig Leaf
What it looks like: Hands clasped together in front of your body, covering your midsection.
Why it's awkward: Creates closed-off body language. Looks uncomfortable and protective rather than relaxed and open.
Fix: Move hands to sides, pockets, partner, or props. Open your posture instead of closing it.
The Death Grip
What it looks like: Holding something (bouquet, partner's hand) so tightly your knuckles are white and fingers are tense.
Why it's awkward: Visible tension screams nervousness. Draws attention to your anxiety rather than the moment.
Fix: Conscious relaxation. You should be able to slide your fingers if hand-holding. Bouquet should rest in your hands, not be strangled.
The Claw
What it looks like: Fingers splayed wide and stiff, creating claw-like hand shape.
Why it's awkward: Unnatural and tense. No one's hands naturally look like this when relaxed.
Fix: Let fingers curve naturally with space between them, but not rigidly separated.
The T-Rex
What it looks like: Hands pulled up to chest level, elbows out, creating hunched posture.
Why it's awkward: Looks frightened or defensive. Creates closed body language.
Fix: Lower hands to natural positions (waist, sides, partner). Relax shoulders down and back.
The Hover
What it looks like: Hands near partner or object but not actually touching—hovering awkwardly in space.
Why it's awkward: Creates tension and looks uncertain. Commit or don't—hovering reads as hesitation.
Fix: If you're going to touch something, actually touch it. Full contact looks intentional; hovering looks accidental.
The Awkward Angle
What it looks like: Hands at odd angles that contort wrists or create unnatural positions.
Why it's awkward: Looks painful and forced. Draws attention to the awkwardness rather than the moment.
Fix: Keep wrists in natural alignment. If it feels uncomfortable physically, it looks uncomfortable visually.
Handling Height Differences in Hand Positions
When partners have significant height differences, hand positions need slight adjustments.
When She's Taller
Hand-holding:
Her arm angles slightly down, his slightly up
Keep elbows bent to prevent awkward straight arms
Consider him standing on a step/higher ground for some shots
Embrace positions:
His hands on her waist (natural)
Her hands on his shoulders or around his neck
Side-by-side embrace works better than face-to-face for extreme height differences


When He's Much Taller
Hand-holding:
His arm angles down significantly, hers up
Walk slightly apart to prevent arm strain
Consider her standing on a step for close face-to-face shots
Embrace positions:
His hands on her lower back or waist
Her hands on his chest or shoulders (easier than neck if height gap is large)
Consider seated or leaning positions that minimize height difference
Pro tip: Height differences aren't problems—they're your reality and part of your story. Good photographers know how to work with any height combination.


Practical Tips for Sweaty or Shaky Hands
Let's address the practical concerns nobody talks about.
If Your Hands Get Sweaty When Nervous
This is completely normal and common.
What to do:
Tell your photographer (we have towels/tissues handy)
Give hands a job (holding something absorbs moisture)
Quick wipe between shots if needed
Movement helps (static standing makes it worse)
What NOT to do:
Constantly wipe hands on dress (creates nervous fidgeting in photos)
Apologize excessively (it's normal, we see it all the time)
How photographers help:
We work quickly so you're not stressed longer than necessary
We position you so hands aren't the focal point if you're very anxious
We have you hold props that absorb moisture (bouquet, jacket)
If Your Hands Shake When You're Anxious
Again, completely normal.
What to do:
Give hands a job (holding, touching, resting on something)
Keep moving (shaking is less visible in motion)
Take deep breaths (physical relaxation helps)
Tell your photographer so we can adapt
How photographers help:
Use slightly slower shutter speeds that blur minor movement
Position hands doing something rather than static holding
Capture moments between actions when hands are more settled
Use movement-based directions (walking, turning) where shaking isn't visible
Should You Practice These Positions at Home?
Short answer: Light practice helps, but don't obsess.
What TO practice:
Hold hands with your partner and walk around
Try different pocket positions (grooms)
Hold a bouquet at the right height (brides)
Stand together in different embrace positions
Why light practice helps:
Builds muscle memory so positions feel familiar
Reduces "what do I do?" panic on wedding day
Helps you find what feels natural for you two specifically
What NOT to do:
Don't practice for hours (creates anxiety, not comfort)
Don't try to memorize every position (overwhelming)
Don't practice expressions or forced poses (makes you stiff)
The goal: Just get comfortable with 2-3 positions that feel natural to you. Your photographer will guide you through the rest.
Your Photographer Will Guide You (But This Gives You Confidence)
Here's something important to remember: your photographer will give you direction during your session.
So why learn these positions in advance?
Confidence: Walking into your portrait session with a mental toolkit reduces anxiety. You're not completely clueless about what to do.
Faster flow: When your photographer says "put your hand on his chest," you don't have to think—you just do it. The session moves more smoothly.
Better results: You can focus on connecting with your partner instead of stressing about your hands.
Communication: You can tell your photographer "I feel awkward with my hands on his face—can we try something else?" when you know what "something else" might be.
But remember: Your photographer has photographed hundreds of couples. Trust their direction. These positions are your foundation, not a script you must follow perfectly.
Frequently Asked Questions
Will my photographer tell me what to do with my hands?
Yes, professional photographers give specific direction about hand positioning. However, knowing these positions in advance makes you feel more confident and helps the session flow faster. You'll feel less anxious if you're not completely reliant on instruction for every single pose.
Do I really need to practice these at home?
Light practice helps but isn't required. Try holding hands and walking with your partner, practice pocket positions (grooms), or hold a bouquet at the right height (brides). Just 10-15 minutes of casual practice builds familiarity. Don't obsess or practice for hours—that creates more anxiety.
What if my hands are different sizes than my partner's?
This is completely normal and very common. Photographers know how to angle shots to minimize size differences or embrace them as part of your natural dynamic. It's not something to stress about—nobody will notice in your final photos.
What if I have a hand scar, injury, or something I'm self-conscious about?
Tell your photographer during your consultation. We can position hands to minimize visibility or work with it naturally. Most "flaws" people obsess over are barely noticeable in photos, but communication helps us adapt our approach if needed.
Should I get a manicure before my engagement session or wedding?
Recommended but not required. Clean, well-maintained nails photograph better than chipped polish or ragged cuticles. Keep it simple—classic colors photograph best. Avoid overly long or dramatic nail art unless that authentically represents your style.
What if my hands shake when I'm nervous?
Give your hands something to do (hold, touch, rest on something) and they'll naturally steady. Movement also hides minor shaking. Tell your photographer—we can adapt by using motion-based positions or faster shutter speeds. This is very common and nothing to be embarrassed about.
What if we're not very touchy-feely people—will these positions feel weird?
Start with less intimate positions (holding hands, standing side by side) and work up to more affectionate ones as you get comfortable. A good photographer reads your comfort level and adapts. Most couples find that even if they're not big on PDA, gentle touches feel natural when it's just the two of you and the photographer.
My partner is comfortable with cameras but I'm not—what should we do with our hands?
Focus your hands on your partner. Touch them, hold them, let them guide the positioning. Your photographer can give your comfortable partner more active roles (spinning you, pulling you close) while you just respond naturally. This takes pressure off you while creating beautiful, authentic images.
How long will we need to hold these positions?
Seconds, not minutes. Photographers work quickly—you might hold a position for 5-10 seconds while they capture multiple angles, then move to something new. You're not stuck in one pose forever. The variety keeps things feeling fresh and prevents fatigue or discomfort.
What if something feels really uncomfortable or awkward?
Speak up! Say "This doesn't feel natural for us—can we try something else?" Good photographers want you comfortable because relaxed couples photograph better. We have dozens of alternatives and can adapt to what works for you specifically.
The Truth About Hands in Wedding Photos
Here's what we've learned photographing hundreds of couples over the years:
The couples who look most natural in photos aren't the ones with "perfect" hand positioning. They're the ones who stopped thinking about their hands entirely because they had specific jobs to do.
The secret isn't finding the "perfect" hand position—it's giving your hands something to do so you stop obsessing over them and can focus on connecting with your partner.
Your hands become awkward only when they have nothing to do. Give them a job—touching, holding, adjusting, resting—and they automatically look natural.
Choose 2-3 positions from this guide that feel most comfortable to you. Practice them lightly with your partner. When your photographer says "let's do portraits," you'll have a mental toolkit to pull from instead of that panicked "what do I do with my hands?" feeling.
And remember: your photographer will guide you. These positions give you confidence and a starting point, but your photographer has done this hundreds of times. Trust their direction. The best hand positions happen naturally when you're focused on your partner, not the camera.
Your hands just need a job. Give them one, and the awkwardness disappears.
Ready to Feel Confident During Your Portrait Session?
At One Story, we specialize in making camera-shy couples feel completely natural in front of the camera. We give specific, actionable direction that eliminates the "what do I do with my hands?" panic—so you can focus on your partner and enjoy your portrait session.
Ready to talk about your Orange County wedding?
Find a Time to Meet with us
Learn more about our Southern California Wedding Photography Services
Orange County Wedding Photographer | Los Angeles Wedding Photographer | San Diego Wedding Photographer | Santa Barbara Wedding Photographer